by
BeetleCraft
This tutorial is written for
Paint Shop Pro 8.
Want to wait and do the tutorial later? Then download one of the following:
Click here for Incredimail file format.
Click here for Word .Doc format.
SUPPLIES:
Any image should work.
Plugins needed:
Simple
Plaid Lite
FRAME:
1. Open Image and resize to no larger than 300 in height.
Shift/D twice - close out original image. Minimize extra copy.
2. Select a light color and a dark color from your image.
3. Image/Add Borders - 3 Symmetric using dark colour from image
4. Image/Add Borders - 6 Symmetric using light colour from image
5. Selections/Select All - Selections/Contract by 6.
6. Selections/Invert
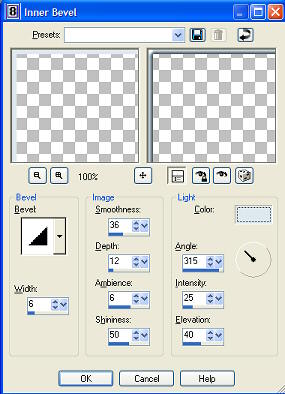
7. Effects/3D Effects/Inner Bevel using the following settings.
Note: The colour you use for the inner bevel should be the same as the light colour you picked.
 8.
8. Selections/Select None
9. Image/Add Borders - 3 Symmetric using dark colour from image<
10. Image/Add Borders - 15 Symmetric using light color from image
11. Selections/Select All
12. Selections/Modify/Contract by 15. Selections/Invert
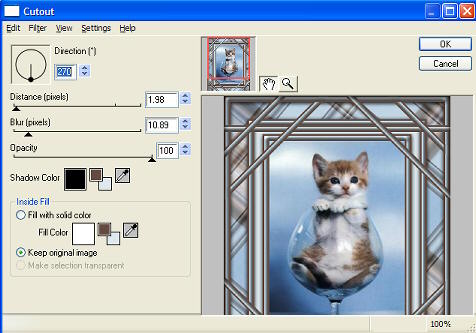
13. Effects/Plugins/Eye Candy 4000/Cutout using the following settings:
 14.
14. Selections/Select None
15. Image/Add Borders - 3 Symmetric using dark colour
16. Image/Add Borders - 6 Symmetric using light colour from image
17. Selections/Select All - Selections/Contract by 6
18. Selections/Invert
19. Effects/3D Effects/Inner Bevel using the same settings as in # 7 above.
20. Selections/Select None
21. Image/Add Borders - 3 Symmetric using dark colour
22. Image/Add Borders - 30 Symmetric using light colour
23. Selections/Select All - Selections/Modify/Contract by 30. Selections/Invert
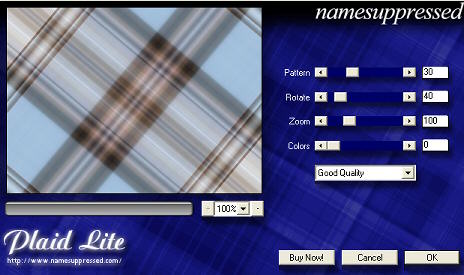
24. Effects/Plugins/namesuppressed/Plaid Lite or it might be Effects/Plugins/Plaid Lite. Use the following settings:
 25.
25. Selections/Select None
26. Image/Add Borders - 3 Symmetric using dark colour.
27. Image/Add Borders - 6 Symmetric using light colour.
28. Selections/Select All - Selections/Modify/contract 6 - Selections/Invert
29. Effects/3D Effects/Inner Bevel using the same settings as in # 7 above. Selections/Select None.
30. Image/Add borders - 3 - symmetric checked - dark colour
31. Selections/Select All
32. Selections/Modify/Contract by 12
33. Selections/Invert
34. Selections/Load/Save Selection/Save Selection to Alpha Channel.
35. Image/Free Rotate - right checked and rotate by 90 degrees.
Make sure All Layers and Rotate Image Layer options are unchecked.
36. Selections/Select None
37. Selections/Load/Save Selection/Load Selection from Alpha Channel loading the selection you saved.
38. Image/Free Rotate - Direction right checked and rotate by 45 degrees.
Make sure All Layers and Rotate Image Layer options are unchecked.
39. Selections/Select None
40. Selections/Load/Save Selection/Load Selection from Alpha Channel loading the selection you saved.
41. Image/Free Rotate - Direction left checked and rotate by 45 degrees.
Make sure All Layers and Rotate Image Layer options are unchecked.
42. Selections/Select None.
43. Add watermark and save as .jpg
Option: If image is too large after you finish the frame, resize by 75%. Sharpen if neccessary.
SIDEBAR:
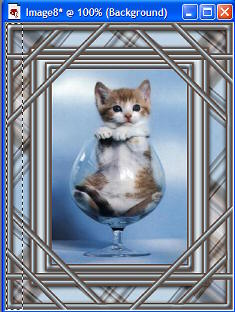
1. Selection Tool/Rectangle and select from the top left corner over to
right till you reach about halfway through the plaid part. See example below.
 2.
2. Edit/Copy -Selections/Select None - Edit/Paste/Paste As New Image.
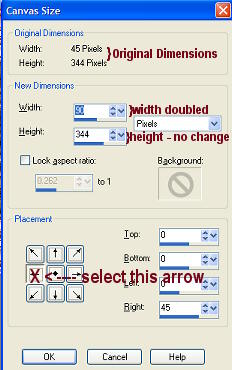
3. Image/Canvas Size - double the width but keep the same height..
make sure you hit the arrow toggle pointing to the left. See example below.
 4.
4. Layers/Duplicate
5. Image/Mirror
6. Layers/Merge/Merge all flatten
7. Save as .jpg - Set aside.
BACKGROUND:
 1.
1. Maximize the other copy of the image you had minimized at the beginning.
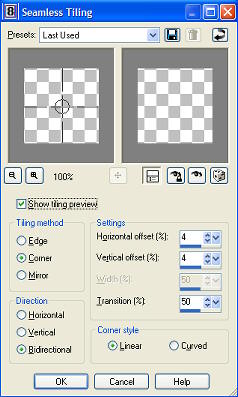
2. Effects/Image Effects/Seamless Tiling using the following settings:
 3.
3. Effects/Plugins/namesuppressed/Plaid Lite or it might be Effects/Plugins/Plaid Lite.
Use the same settings you used in #24 of the frame.
4. Effects/Plugins/Simple/4 Way Average.
5. Effects/Plugins/Simple/Centre Tile.
6. Effects/Image Effects/Seamless Tiling using the same settings as #2:
7. Save as .jpg
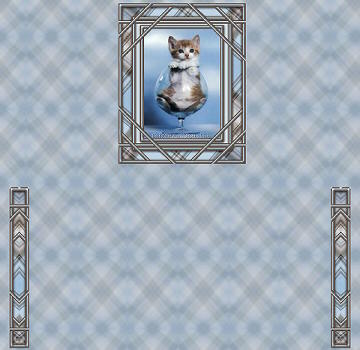
Put together in Incredimail's Letter Creator or any other stationary program you use.
Tutorial Written by
KaEfEr of:

To be notified whenever we update our site, please join our
UPDATES list.
